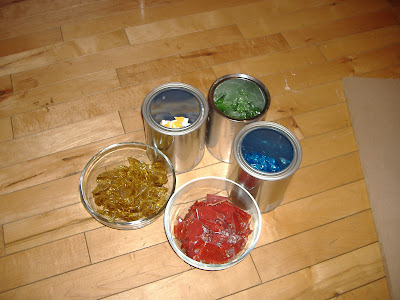
Bondera comes in two different styles: one for verticle tile projects and another for countertops. According to their website, Bondera is NOT for use on floors or ceilings. To create my mosaic art piece, I used the Bondera made for walls which was sent to me from the awesome Bondera people. Take note that I broke a few of the rules in the process of doing my project but hey, what else would you expect?! In the coming weeks, I'll do another mosaic where I follow every rule to compare the results.
The tips and tricks below are based on doing a mosaic piece using Bondera.
1. First, gather your tiles. If you're doing a mosaic, I'd recommend using mosiac tiles bought from a craft store...it's easier! If you want to make your own tiles out of broken glass objects, make sure that all your objects are the same thickness. I didn't. Instead, I bought several vintage vases, glasses, and bowls, all of which are different sizes and shapes which will make it a little harder to grout. If using Bondera for your mosaic, choose opaque glass so that you don't see the Bondera underneath.
2. Grab your hammer! If you're making your own tiles, you'll want to wrap the dishes/vases/etc. that you're using in an old towel or scrap fabric. Take note that some of the glass shards will get stuck in the fabric and that it may tear at spots so don't use your good pillowcases. Remember to wear your safety glasses!
3. Plot out your design. You don't have to lay out every single piece, but make a general template so you can see what your mosaic is going to look like. Being lazy and extremely impatient, I just did a simple random pattern that didn't require much thought. One thing to remember...make sure you don't use all your big pieces at once, otherwise you'll end up with all the big tiles on one side and small at the end.
4. Lay your Bondera. Measure a million times, cut once. Once you've got everything cut to size, remove the backing and lay your Bondera onto a clean dry surface. A straightedge helps though the grid on the Bondera sheets makes cutting easy. If you're having problems with bubbles in the sheet, head over to the Bondera website for tricks on laying the adhesive flat.
*Bondera Tip: Cutting something sticky like Bondera, contact paper, or labels? Put oil or cooking spray onto a paper towel and wipe the blades of your scissors. Now you'll be able to cut easily without getting your scissors stuck in goo!
5. Place your tiles. This is where I started to cheat. I used translucent glass for most of my project which made it so you could see the grid of the Bondera through the glass. Not exactly a pretty site. My solution was to spray paint the Bondera off-white before laying the tiles. Sounded like a good idea at first, but it made it harder to get the tiles to stick. I had to really dig them in for them to stay, so you can still see the Bondera grid under a few of them. Thinking back, it may have been smarter to paint the backs of the tiles instead. I'm going to contact the Bondera folks to see if they have a better solution. Maybe they'll come out with a non-grid version in the future! If you're using store-bought tiles or opaque glass, you can easily lay your tiles directly on the Bondera. The sheets are super sticky and the tiles adhere perfectly with no messy mortar to deal with.


So cool!!! Do you sell your mosaics??
ReplyDeleteI'll take that as a compliment! I wish I had the patience and talent to make mosaics worthy of selling! This was actually my first one. It's a lot of work (and cuts on my fingers!) so I don't know how many more I'll be doing but it was a fun project. Hopefully the grouting goes well and I dont screw up the whole thing!
ReplyDeleteYay, a mortar alternative! I won't get to use this often, as I'm usually tiling floors and tub surrounds, but this product looks fantastic for backsplashes. Can't wait to see pictures of the finished project!
ReplyDeleteIt is a pretty cool product. You wouldn't be able to do the floors but I think you could do the tub surround since this is rated for use in bathrooms and kitchens and creates an anti-mold barrier of sorts. I wish they'd come out with a floor version. It would make life so much easier!
ReplyDelete